


Modern bathroom renovation ideas, layout, finishing, and lighting
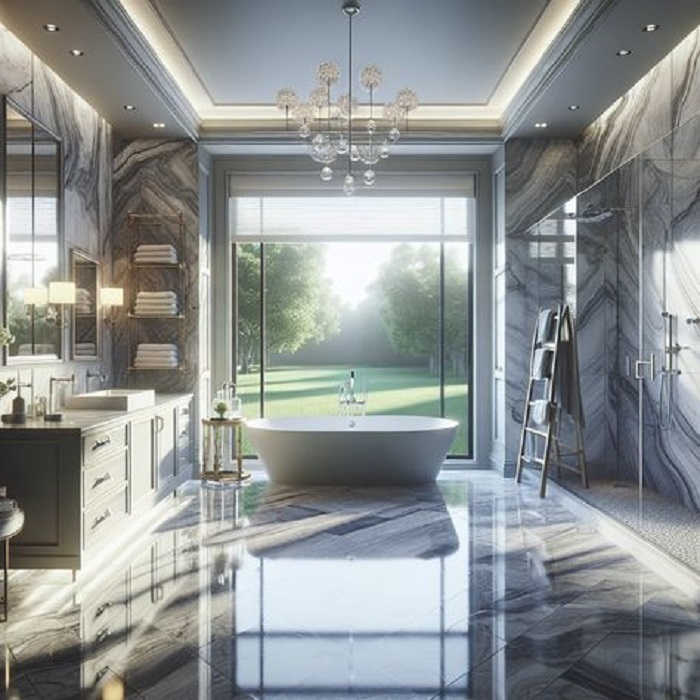
A modern bathroom renovation begins with understanding the objectives: do you need maximum storage space, is a spacious shower area important, and are you planning on installing a washer and dryer? The more accurately you define the usage scenarios, the easier it is to choose the layout, materials, and plumbing fixtures without overspending or reworking.
A bathroom is a room with high humidity, so high-quality waterproofing, well-thought-out ventilation, and moisture-resistant coatings are key. This is the foundation upon which the durability of the finish, the safety of the electrical system, and the comfort of everyday use are based on link.
Assessing the condition of the waterproofing and common mistakes when removing old finishes
Before beginning a modern bathroom renovation, it is important to soberly assess the condition of the waterproofing: it is responsible for protecting the ceilings, walls, and adjacent rooms from leaks and moisture accumulation. A visually «dry» finish does not guarantee the integrity of the underlying layer – problem areas are often hidden under tiles, screed, and at joints.
Proper diagnostics when removing old finishes helps determine what can be saved and what needs to be completely redone, and help prevent common mistakes that lead to repeated leaks, mold, and foundation damage. Below are practical guidelines for inspection and a list of common mistakes.
How to tell if waterproofing needs replacing, and what not to do during dismantling
- A musty smell and persistent moisture, especially in corners and near the floor, even with proper ventilation.
- Mold along seams, near baseboards, behind plumbing fixtures; darkening of grout and «spreading» of seams.
- Blistering and peeling of tiles, paint, and plaster; «Voids» under the tiles when tapped.
- Cracks in the screed/subfloor, especially those running through corners and abutment areas.
- Efflorescence (white salt stains) on joints and concrete is an indirect sign of moisture migration.
- Rusty streaks on embedded/metal elements, wet spots around pipe entries.
Typical mistakes when removing old finishes are most often associated with an attempt to «save what’s there,» speed up dismantling, or hide problem areas under a new layer.
- Dismantling «to zero» without analyzing the causes: removing the tiles and immediately starting to level them without checking the source of the moisture (joints, abutments, cracks, utility entries).
- Damage to the foundation and components Adjoining areas: using a hammer drill, they break up the screed/corners down to the loose concrete, disrupting the geometry and creating new cracks.
- They leave the old waterproofing in fragments and «glue» it in places. Different materials and age layers rarely provide reliable adhesion and continuity.
- They ignore areas around pipes and drains: during dismantling, they destroy seals and cuffs, and then fail to restore the assembly according to the technology.
- They remove tiles without checking for leaks from hidden joints: as a result, new layers cover up the existing problem.
- Dust «savings»: they do not remove dust and weak layers, leaving crumbling areas; Then, the waterproofing and adhesives are attached to a fragile base.
- Drying «by eye»: cover the damp base without waiting for it to dry properly (moisture remains under the waterproofing and causes peeling and mold).
A practical assessment procedure: after removing the finish, clean the surface to a solid base, inspect the corners and joints, check the integrity of the screed, the condition of the pipe entries, and any traces of prolonged moisture. If there are any doubts about the reliability of the old layer, it is better to plan a complete re-installation of the waterproofing as a single unit, with mandatory inspection of the joints.
Bottom line: a high-quality bathroom renovation begins with an honest diagnosis of the hidden layers. If cracks, peeling, traces of prolonged moisture, or damaged joints are discovered upon opening, attempts to «patch» them are usually more expensive than a full restoration of the waterproofing using the technology. A continuous layer, careful dismantling, and attention to detail are the key to a long-lasting result without leaks or mold.
Hello!! My name is Jeanine
I love to eat, travel, and eat some more! I am married to the man of my dreams and have a beautiful little girl whose smiles can brighten anyone’s day!